

1: How to enable the PowerUp and where to manage the custom fields
To enable the Klaviyo integration, first go to the PowerUp tab and enable the 'Email Marketing PowerUp':
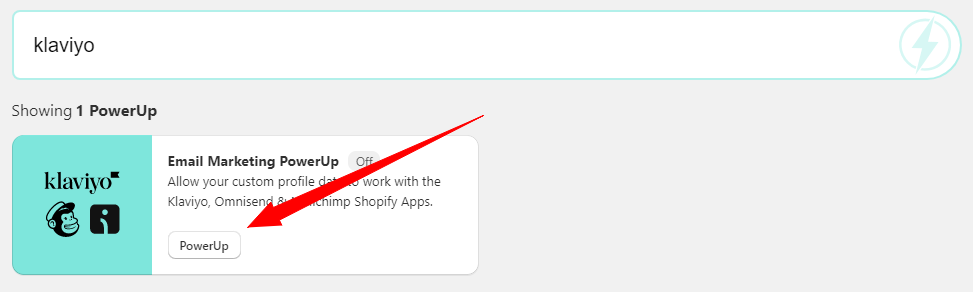
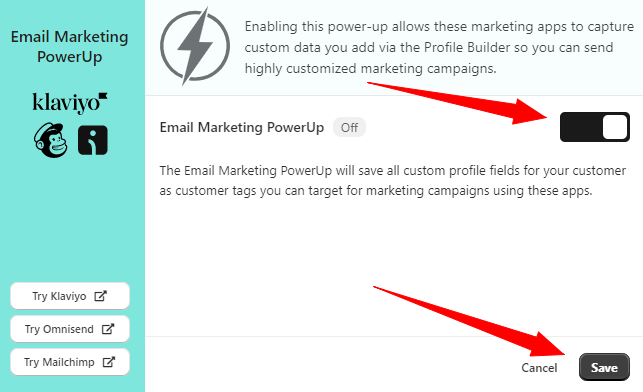
Enable the PowerUp and hit the save button:
Once enabled and saved, head over to the Configuration menu and select Profile builder.
Any fields that have been previously added or are added from now will be integrated with the Klaviyo app.
Don't have any fields added yet? To learn how to add fields, simply click on on the the "how to" guides on the Profile builder page below:
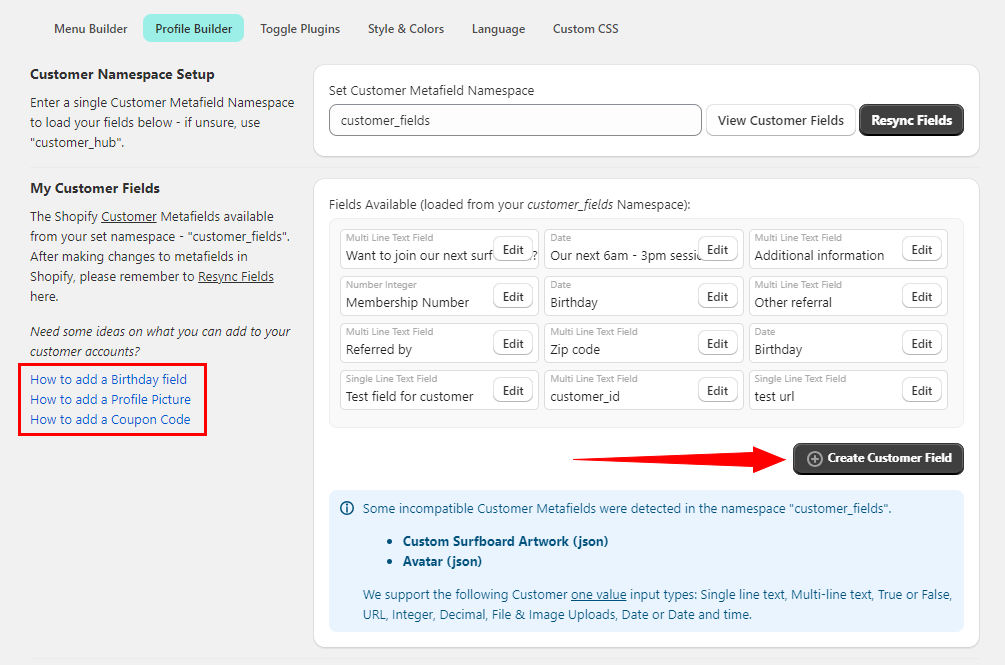
Or click HERE to run through our example tutorial on how to add a birthday field to the customer account.
2: Where to manage the custom fields inside of the Klaviyo app
All of the fields that you add to the customer account page through the profile builder are converted into 'customer tags' so the Klaviyo app can work with them. These details can be managed by simply opening the Klaviyo app and go to 'Audience > Lists & segments'.
Select the 'Definition' 'Properties about someone' as well as 'Shopify Tags'.
In the 'Dimension value' drop down you'll now see the captured information from the customerhub app as shown in the below example:

You're now ready to start sending targeted campaigns to your customers!
Not sure how to create a campaign? Klaviyo has you covered with their handy help guide below:
How to create and send an email campaign