

Managing CustomerHub Plugins: A Step-by-Step Guide to Customizing Your Shopify Store's Customer Account Experience
Customizing your Shopify store's customer account experience with CustomerHub plugins is simple and efficient. In this step-by-step guide, we will show you how to manage CustomerHub plugins, including enabling and disabling them, to create a personalized experience for your customers.
Step 1: Access the CustomerHub app
Log in to your Shopify admin dashboard and click on 'Apps' in the left sidebar menu. Find the CustomerHub app in the list of installed apps and click on it to access its settings.
Step 2: Navigate to 'Customize'
Once you have opened the CustomerHub app, click on the 'Customize' tab located in the app's navigation menu. This will open the customization settings for your customer account page.

Step 3: Open the 'Plugins' section
In the 'Customize' tab, click on the 'Plugins' section. This will display a list of available CustomerHub plugins that you can enable or disable for your Shopify store's customer account page.

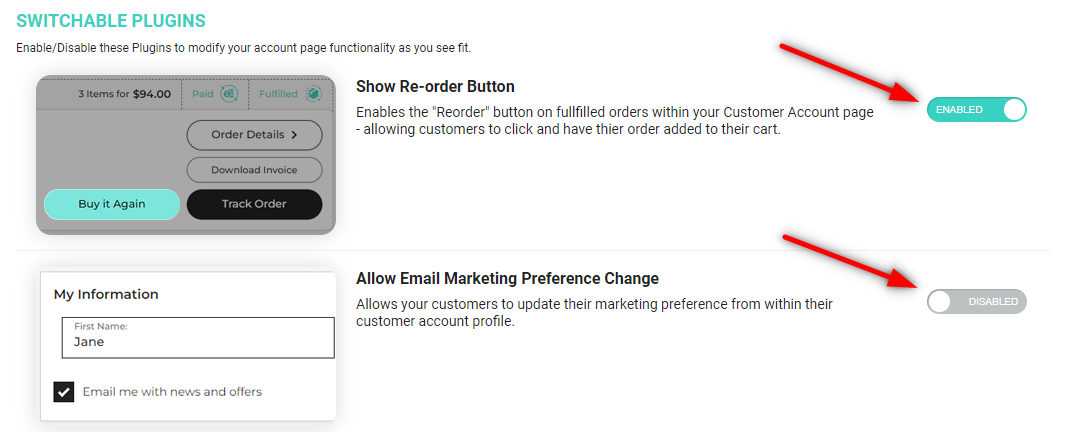
Step 4: Enable or disable plugins
To enable or disable a plugin, simply toggle the switch next to the plugin's name. When the switch is green, the plugin is enabled, and when it is gray, the plugin is disabled. Remember to click 'Save' in the top right of the page to save your changes.
Step 5: Verify changes on your customer account page
After saving your changes, visit your store's customer account page to ensure that the enabled plugins are functioning as expected. If you encounter any issues, contact the CustomerHub support team for assistance.
By following these simple steps, you can easily manage CustomerHub plugins and customize your Shopify store's customer account page to deliver an exceptional user experience.